Abstract
I can’t remember when I first saw photos of the Ojas listening room, and speaker cabinets designed by Devon Turnbull, but as a working carpenter at the time, it amazed me. Not only was the design language of Tom Sachs and others that harness the imperfections of hand-made objects present in something that produced apparently wonderful sound, but a project like a speaker cabinet seemed like a baby-step towards understanding the sound and electronic equipment I was fascinated by.
If by building some speakers, I could take full ownership over their operation, learning about AC signals, frequencies, impedance vs resistance, impedance matching, series and parallel audio circuits, then I could take this knowledge with me and make the next thing. While I loved carpentry and was looking forward to the opportunity to make something furniture-grade for my own home, this project was all about getting more involved in the electrical world of hifi.
So I set out to create a brand for all these projects and settled on Muon Electronics, spelled with the lowercase mu, a name I recently dropped but was a saga of gaining electrical awareness for me that all started with this basic project.
Design
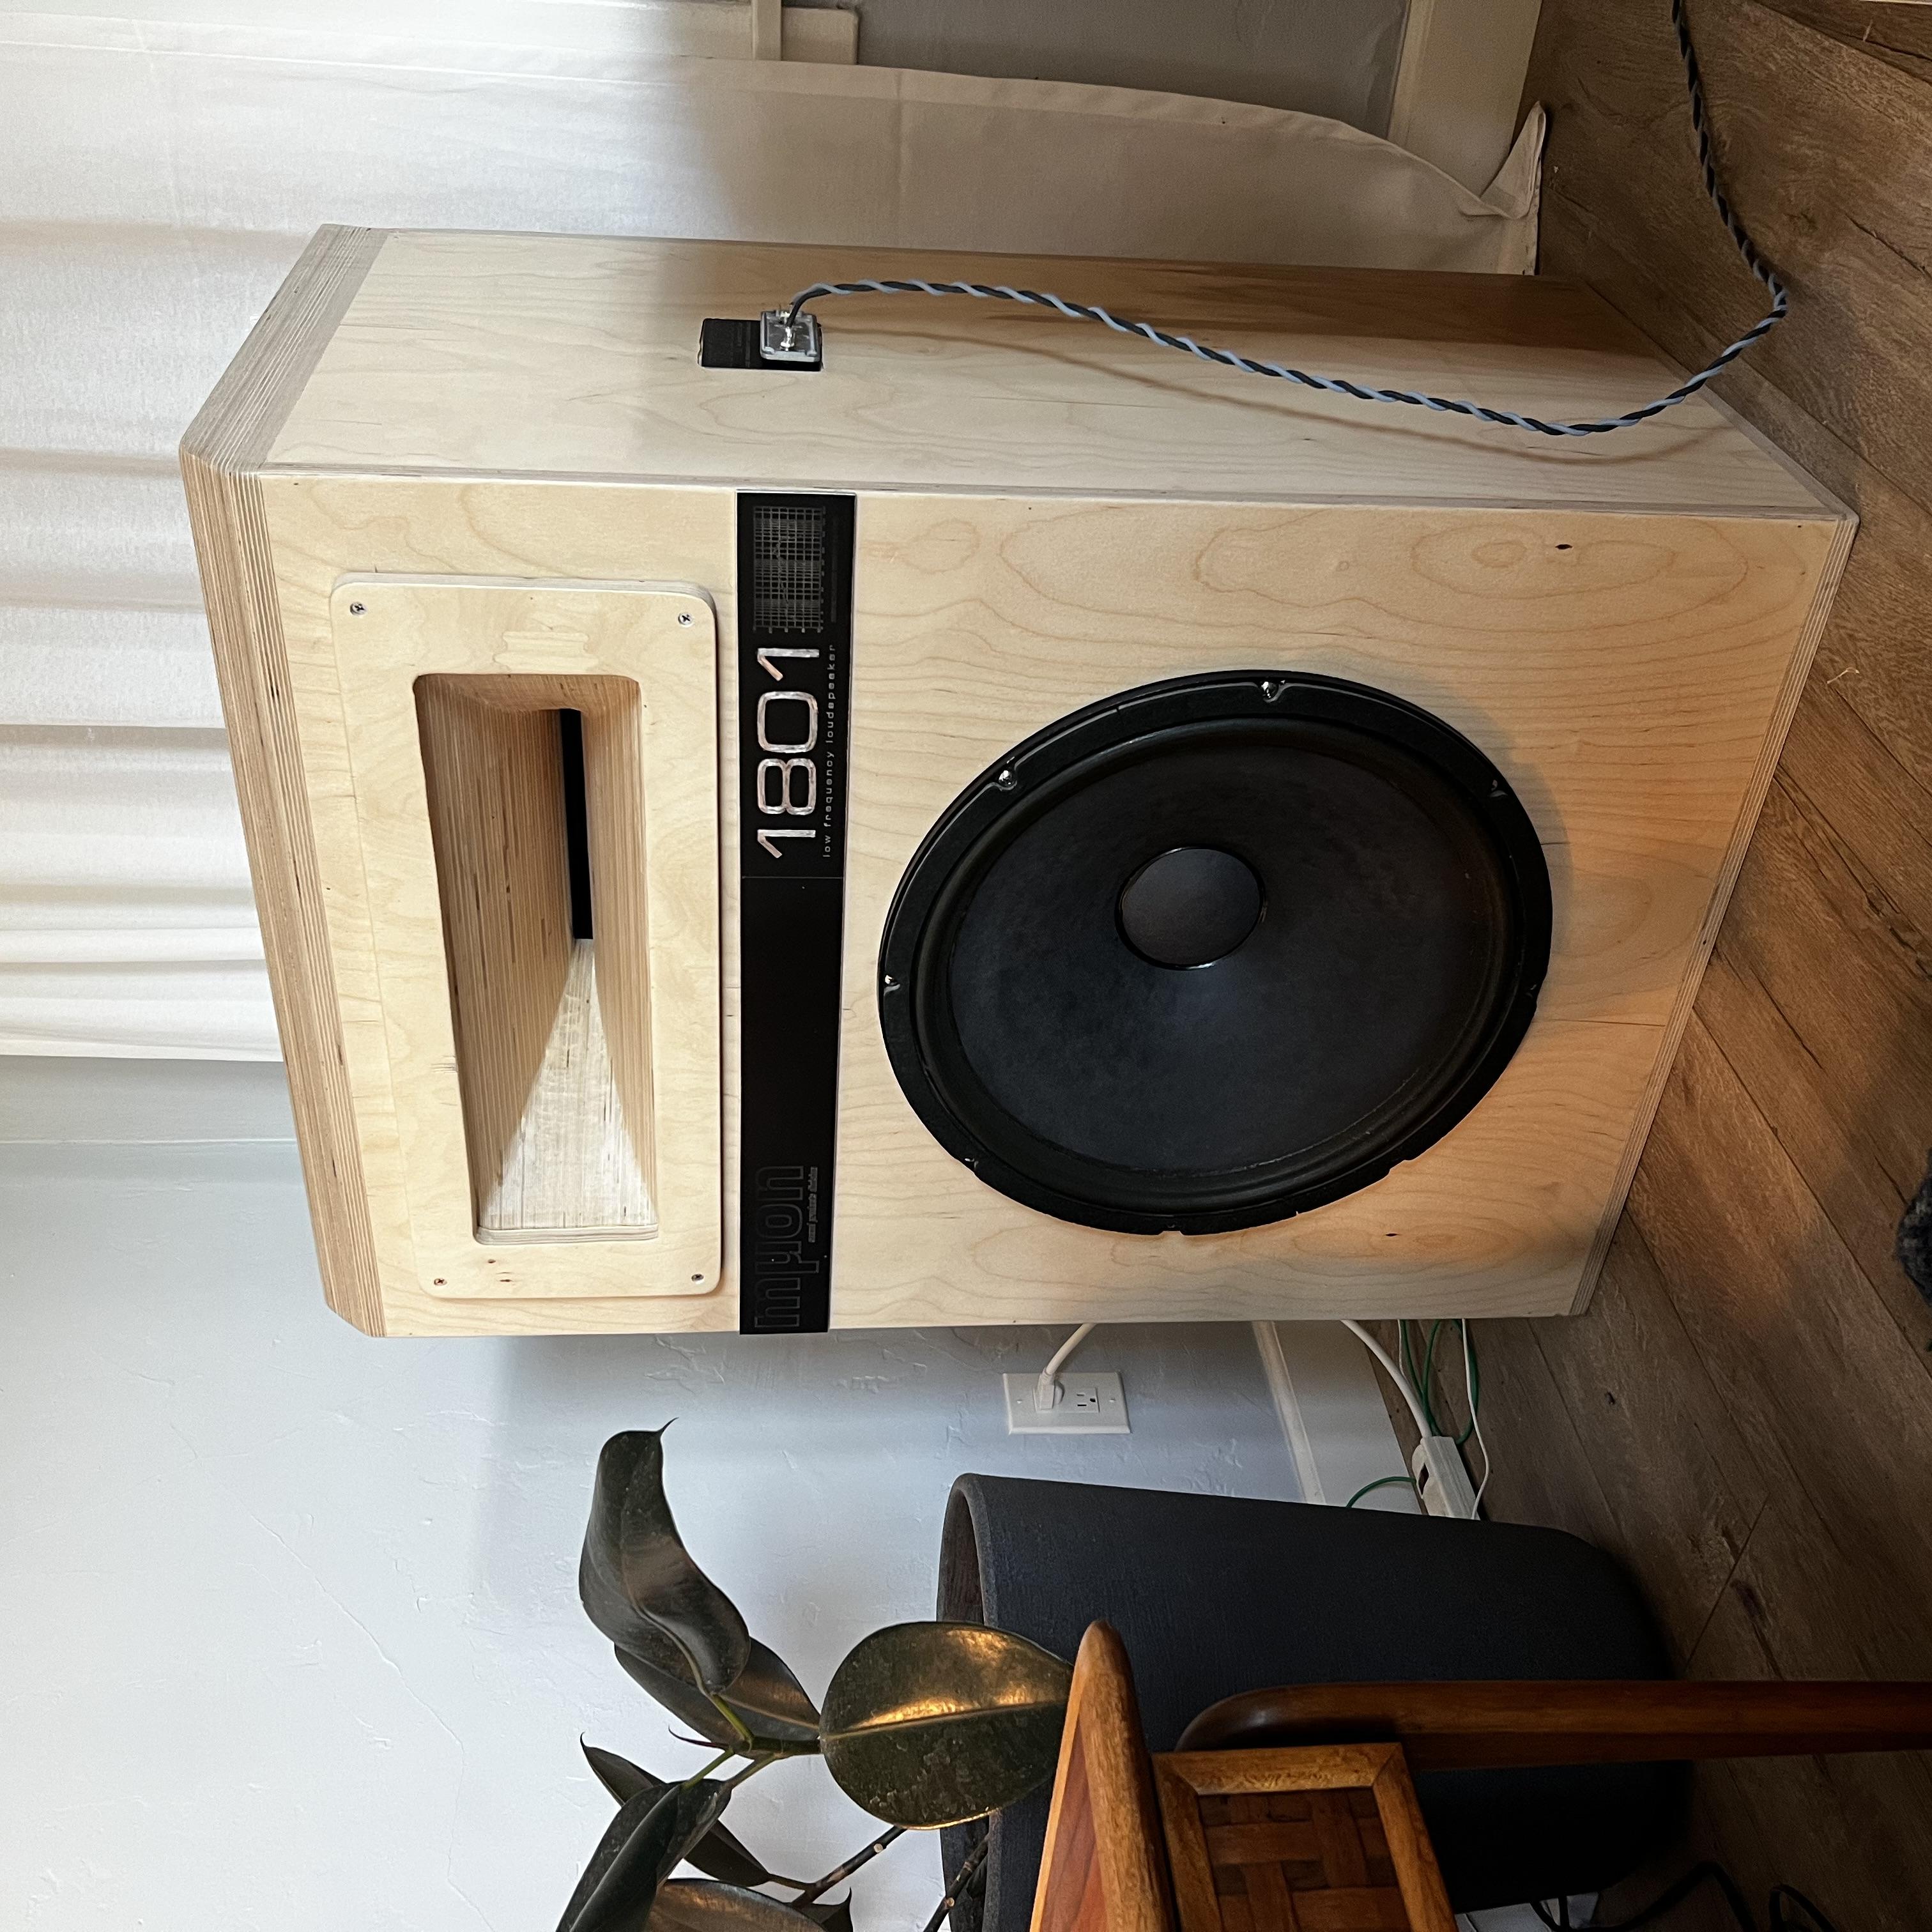
I wanted to have a stereo low frequency system to rival the amazing 32” Fostex sub system Ojas had just come out with. The aesthetic would be a simple box, as nice as I could make it, that would demonstrate the beauty and incredible engineering of plywood. These cabinets would house the biggest speakers I could find that had reputable performance and frequency response up to around 800 Hz. So the project was designed backwards around the Electro Voice DL18W and at 18” they were big enough to feel as iconographic to a design, without going too crazy. Since I wanted to do this right, I found the spec sheet and worked with the recommended 9 cu ft cabinet volume and vent dimensions. The speaker was originally used in movie theaters with THX systems and was crossed-over at 800 Hz, while going down to 60, which was perfect for me.
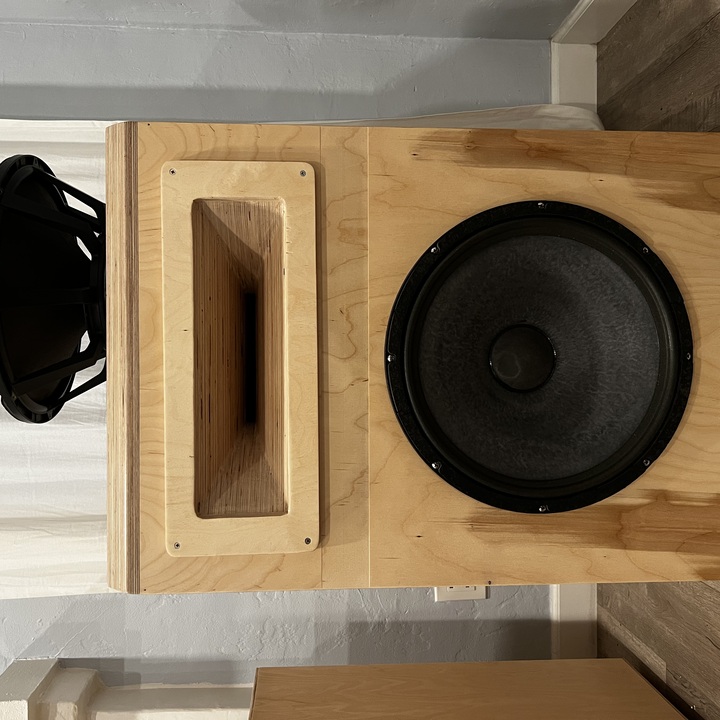
The more ambitious parts of the design would be the horn vents and the plywood sandwich on the top. I wanted to channel the end-grain obsession of the Tom Sachs plywood cube, and did so with four layers of plywood sandwiched together on the top of the cabinets, with a bevel across the front that would accentuate the 52 layers of wood even further. The horn was designed in Fusion, as one solid piece, then body split by 3/4 inch slices that would be routed by CNC and glued together. Sometimes employed in speaker design, a horn vent can be used to change the effective area of the vent and changes frequency response, I saw this design used in some TAD speakers and I really wanted to meet the fabrication challenge of creating these portions of the cabinets, and any higher frequency response would be a plus, since I wanted this system to avoid midrange drivers.
Fabrication
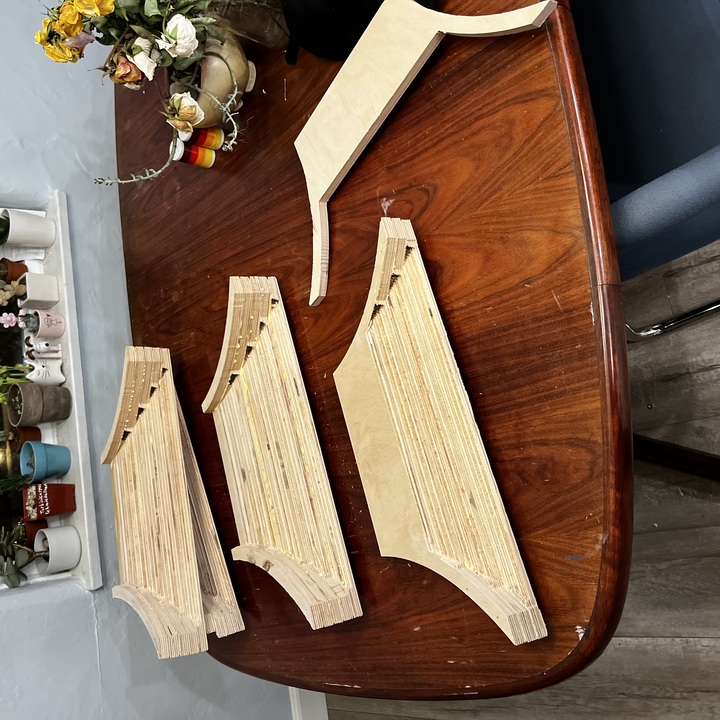
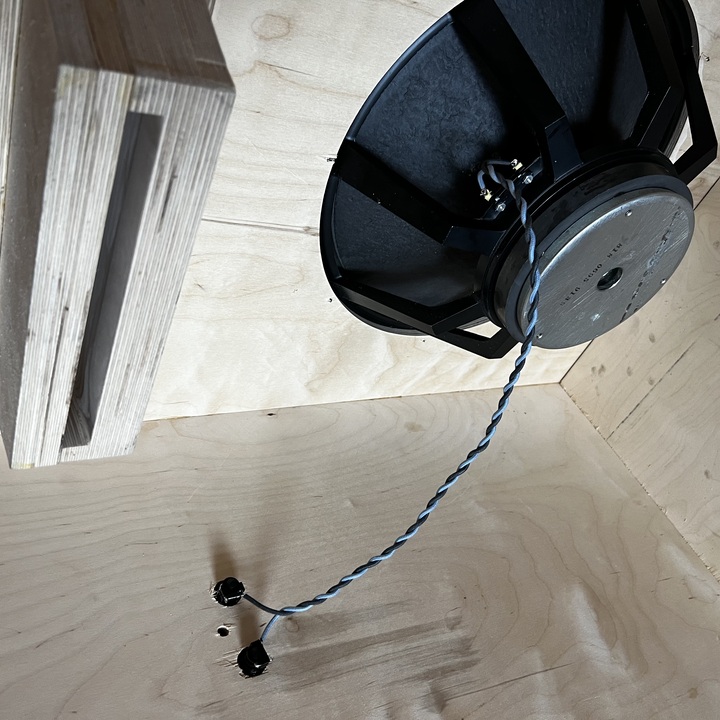
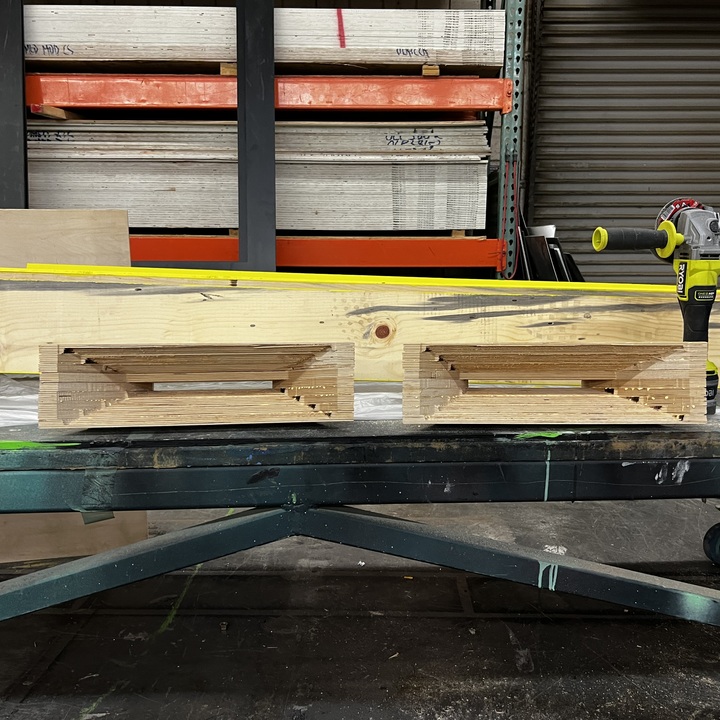
Fabrication started by designing the port shapes of the cabinets’ front panels, these were converted from faces of 3D parts into DXF files and milled out of baltic birch on a CNC router. Thus the speaker actually had a dimensioned recess to sit in slightly below the surface of the wood. Next, once I had the final dimensions of this first part, I could confidently cut the other cabinet parts on a table saw. Once done with that I could glue up the cabinets and move to the two more complicated portions. It was tricky to make sure I perfectly match the dimensions and squareness of these tops eight times without errors, there were some deviations but it overall only took one attempt to get right. Next I did the horns, for these I had to mill them one layer at a time, thus I broke the model apart and exported OBJs of each section to be milled by the CNC. The internal contour of the horn would only be a smooth as the step over preprogrammed into the mill.
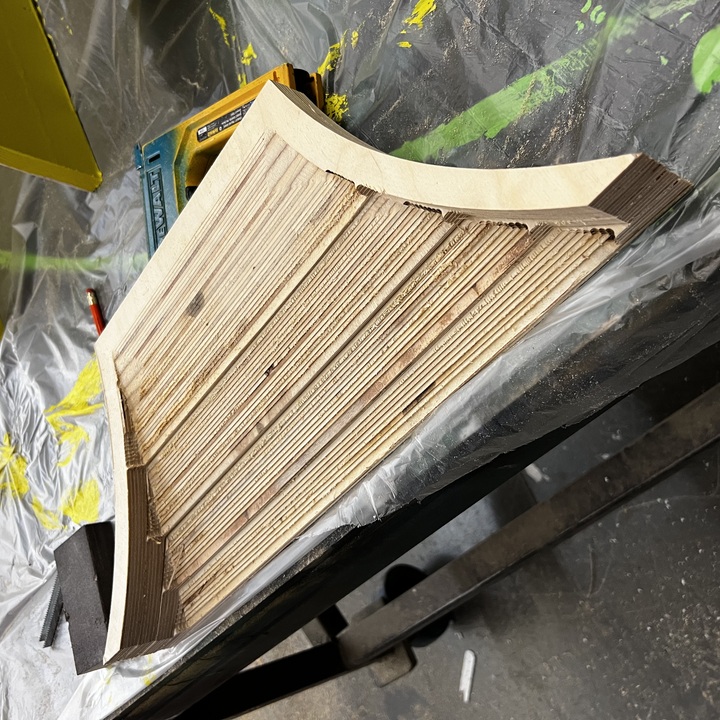
Here it would be worth noting that this was my second ever CNC project! I didn’t know how to change the step over or passes or directions for contouring tool paths, so each pass had an 1/8th inch stair step, because our machine was set to remove as much material as possible at all times, so since the parts were cut, glued together and dry, I now had to hand sand all these horns to their true shapes. This took a lot of mind-numbing time, as all sanding does, but now when I look at them I can remember all that hard work, and the importance of making sure the automated part of a build is as efficient as possible.
Since these horns looked cool, but were not technically the right move for venting this speaker box, I made this portion of the cabinet interchangeable, in case I one day wanted to make a different style of manifold for this area. The horns were attached with a gasket of 3M VHB, and screwed in at the corners.
Once these steps were complete I designed some aluminum badges for the connection terminals on the speakers’ sides, and a nameplate for the front. These were done by spray painting aluminum black, then using a laser engraver to ablate the spray paint away forming the design. I then cut the parts out with a jigsaw and attached them with VHB tape.
Conclusions
This project ended up being exactly what I wanted, a small step toward designing audio equipment, a skill I’m still improving upon today. It was also one of my first digital design projects that I actually manufactured with the professional machinery I had available to me at my job, building this speaker was an opportunity to interact with those tools and produce something to a much higher standard than I ever had before. They are no doubt the best sounding speakers I’ve ever had when paired with JBL horns. I am sure there is room to improve with them sonically, but I haven’t noticed and I hope to sharpen my skills until that day comes, so whatever replaces them will be lightyears better.